Photoshop artists create cool masterpiece in other ways besides digital art. Many of them use photos they've taken or pulled from the internet and manipulate them into creating a surreal image. You task is to attempt to do the same, using Photoshop's instagram page as your inspiration!
Keep in mind - these guys are pros. So yours might not turn out exactly the same way - the goal is to use the techniques and tools you have learned so far to create a manipulated image as best as you can. This project is going to require some PROBLEM-SOLVING and CREATIVE THINKING - how can you get the result you want and what tools/techniques will you need to do it?
This should NOT take 20 minutes to do, but rather two classes worth of work. This is because I want you to be paying special attention to things like SHADOWS and edges, and colours. You can google almost anything and there will be a tutorial on how to do it so if you need to add mist to your sign - LOOK IT UP, or ask your teacher for help.
Some inspiration:
Check out Photoshop Instagram page HERE
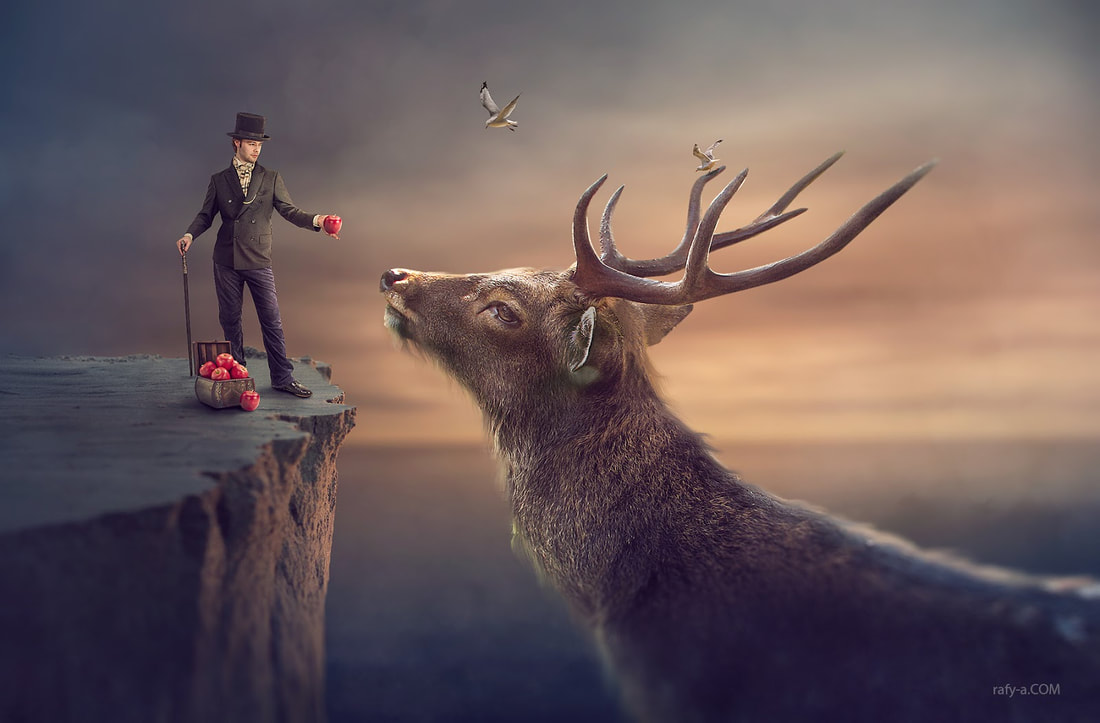
If you look at this photo below, the main reason it looks so good is that they worked on the LIGHTING of the photo. Your adjustments panel can help you with that!
**AVOID getting one cool image and adding a few things to it. Instead, each individual element in your design should be a separate photo you find on the internet. The birds, the apples, the deer, the guy's basket, the cliff - all should be different photos.
With a surreal image there should be some kind of element that challenges the reality. You can change the size of things, alter the laws of physics, create some mystical creature or reverse the nature order of things.
MUST-HAVES:
Keep in mind - these guys are pros. So yours might not turn out exactly the same way - the goal is to use the techniques and tools you have learned so far to create a manipulated image as best as you can. This project is going to require some PROBLEM-SOLVING and CREATIVE THINKING - how can you get the result you want and what tools/techniques will you need to do it?
This should NOT take 20 minutes to do, but rather two classes worth of work. This is because I want you to be paying special attention to things like SHADOWS and edges, and colours. You can google almost anything and there will be a tutorial on how to do it so if you need to add mist to your sign - LOOK IT UP, or ask your teacher for help.
Some inspiration:
Check out Photoshop Instagram page HERE
If you look at this photo below, the main reason it looks so good is that they worked on the LIGHTING of the photo. Your adjustments panel can help you with that!
**AVOID getting one cool image and adding a few things to it. Instead, each individual element in your design should be a separate photo you find on the internet. The birds, the apples, the deer, the guy's basket, the cliff - all should be different photos.
With a surreal image there should be some kind of element that challenges the reality. You can change the size of things, alter the laws of physics, create some mystical creature or reverse the nature order of things.
MUST-HAVES:
- A original work of art that strives to be as realistic as possible while still creating a surrealist image. You want it took look magical but still like it has the potential to be real.
- All edges and cuts should be invisible (soft eraser can help)
- There should be shadows and a light source of some kind
- There should be an element that challenges reality.
- Lighting and color should be considered and manipulated so that it is cohesive through the composition.

|
|
EXTRA TOOLS YOU MIGHT NEED:
For getting rid of things like watermarks:
Spot Healing Brush (looks like a band-aid) - change the size (right-click) and then click once on the area. You could also click and drag over an area but basically this tool is taking everything around your brush and filling it into that spot.
For blending areas or erasing soft edges:
Eraser (E) - right click to change size of the eraser (larger is better) then lower the hardness to 0.
For making certain areas darker/lighter
Dodge/Burn (O) - Dodge makes things lighter, Burn makes things darker (right click for size)
To add an adjusment to only one area:
Select that layer first (CTRL+CLICK the THUMBNAIL), then add your adjustment
If you want a photo that doesn't have a background, try add the word "png" after your word in google search.
